
Replacing garage door springs the right way requires more than just removing the old ones and sliding in new ones. Every step of the process follows a precise order that professional technicians in San Diego are trained to execute correctly, and skipping any part of that order puts the entire door system at risk.
Getting garage door spring repair done the first time correctly protects the entire door system from unnecessary wear, uneven movement, and costly damage. This guide covers everything from identifying the right spring type to understanding the full replacement process.
Why Should You Hire a Professional to Replace Garage Door Springs?
Garage door springs store an enormous amount of energy, and releasing that energy without the proper training or specialized tools creates a safety hazard that puts the entire door system and everyone nearby at risk.
Key reasons why professional handling is the only way to go:
- Professional technicians carry specialized tools designed specifically for winding and unwinding torsion springs under extreme tension
- Improper installation of the wrong spring creates additional strain on the cables, drums, and garage door opener
- A broken torsion spring that is mishandled during removal can release stored energy violently and cause severe injuries
- Professional technicians inspect the full system during replacement to catch any related issues before they turn into costly repairs
To understand what drives the price of a professional spring replacement, read our guide on Why Is It So Expensive to Replace Garage Door Springs?, which breaks down every contributing factor in detail.
What Homeowners in San Diego Should Know About Garage Door Springs
The Two Main Types of Springs Used in Most Garage Doors
Knowing which spring type is installed on your garage door is the first thing any technician confirms before starting a replacement job.
Factor | Torsion Springs | Extension Springs |
Placement | Mounted horizontally above the door opening | Runs along both sides of the door |
How It Works | Twists to generate tension and lift the door | Stretches and pulls the door upward |
Best For | Modern residential garage doors | Older and lighter garage doors |
Lifespan | Longer cycle life under regular use | Shorter cycle life, wears faster |
Safety Requirement | None required | Must be paired with safety cables |
Identifying the correct spring type from the start ensures the right parts are ordered, and the replacement is completed without delays.
Why the Type of Spring Affects the Replacement Process
Every decision made during a spring replacement job is shaped by the type of spring installed on the door.
Here is why spring type matters in every replacement job:
- Torsion springs require specialized winding bars and precise turn counts
- Extension systems involve pulleys and safety cables that must all be replaced together
- Load capacity differences determine the exact wire gauge and size of the replacement spring
- Wrong spring selection forces a full redo, adding unnecessary time and cost to the job
Knowing the spring type upfront allows every garage door spring replacement to be completed with the right parts and no guesswork.
Warning Signs That Tell You a Spring Replacement Is Overdue
Spring problems rarely appear out of nowhere, and recognizing the early signs gives you enough time to act before the entire system gives out.
Watch for these warning signs:
- A visible gap in the torsion spring coil means the spring has completely snapped
- Unusual noises like grinding or popping signal that the springs are losing tension
- Uneven movement where one side rises higher points to an unbalanced load
- The door feels extremely heavy when lifted manually, confirming the springs are failing
- Frayed or slack cables on either side indicate the springs have lost necessary tension
To spot these warning signs before they turn into a full breakdown, read our guide on Signs Your Garage Door Springs Are About to Fail, which covers the most telling indicators homeowners notice before complete failure occurs.
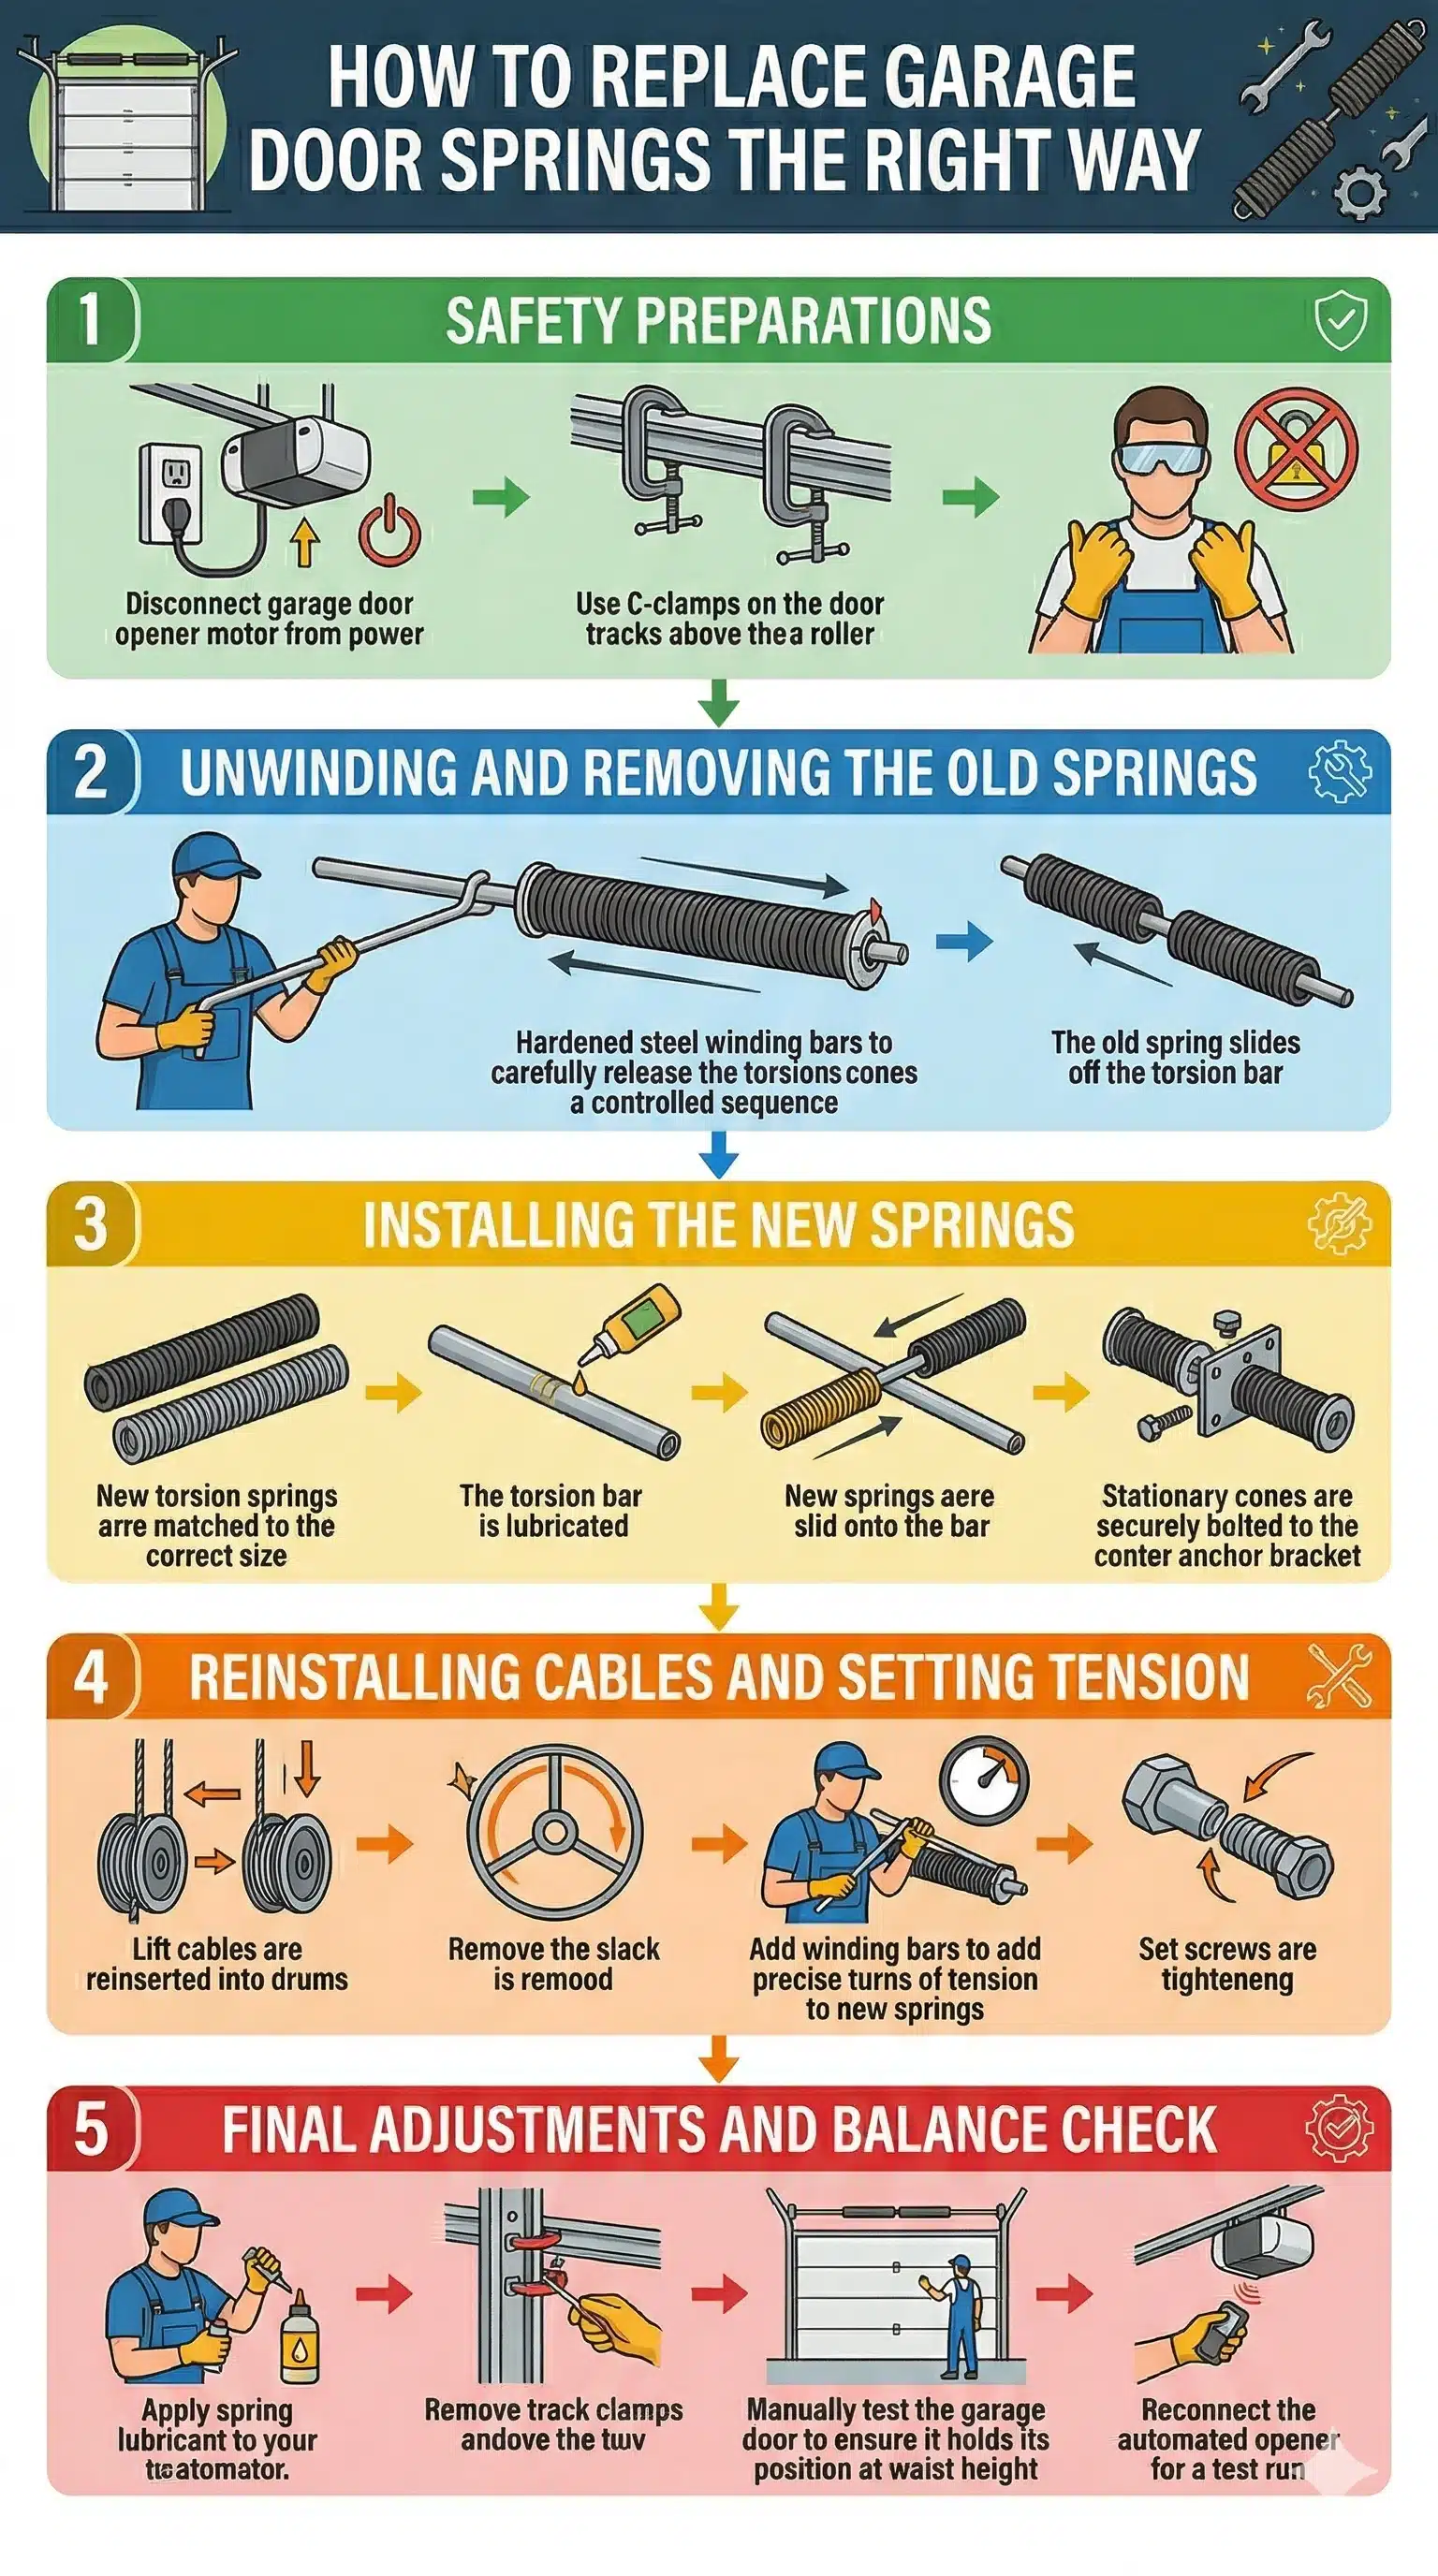
How Garage Door Spring Replacement Is Done the Right Way
Safety Preparations
Professionals secure the entire work area before touching any component to eliminate the risk of accidental door movement.
Key preparations done before any work begins:
- The garage door opener gets disconnected, or the breaker is turned off to prevent accidental activation
- C-clamps or locking pliers are placed on both tracks above a roller to lock the door in the closed position
- Safety glasses and gloves are worn throughout the entire process to protect against metal fragments
- The work area is cleared of anyone not directly involved to eliminate the risk of injury from a sudden spring release
Every skipped preparation can turn a routine replacement into a property damage or injury situation.
Unwinding and Removing the Old Springs
Removing old springs is the most tension-intensive part of the job, and professionals follow a strict sequence to release that energy safely.
Steps followed during removal:
- Right-hand wound and left-hand wound springs are identified first to ensure correct replacements are ordered
- Hardened steel winding bars release tension from the winding cone one-quarter turn at a time
- Both springs are removed even when only one is broken because the other has endured the same wear
- Set screws on cable drums are loosened, and lift cables are disconnected before the springs slide off the bar
Releasing stored tension in a controlled sequence is what prevents sudden failure or injury during removal.
Installing the New Springs
Getting new springs onto the torsion bar correctly determines whether the door will operate with proper balance after installation.
What happens during a new spring installation:
- The torsion bar gets cleaned and lightly lubricated before the new springs slide into position
- New springs are matched to the correct wire size and inside diameter based on door weight
- Stationary cones are bolted securely to the center anchor bracket to keep everything aligned
- Lift cables are reinserted into drums and rotated to remove slack before set screws are tightened
Secure mounting on the center bracket provides new springs with a solid foundation to withstand thousands of cycles without failure.
Reinstalling Cables and Setting Tension
Setting the correct tension is the most technically demanding step, and getting it wrong affects every part of the door system.
Critical steps in tensioning the new springs:
- Winding bars are inserted into the cone, and the spring is wound upward opposite to the wire winding direction
- Standard seven-foot doors require thirty to thirty-one quarter turns to reach the correct tension
- Marks are made on the shaft before winding, so technicians count turns accurately
- Set screws are tightened firmly once the correct tension is confirmed to lock the spring in place
The tension that matches the door’s exact weight and height keeps the opener and cables from carrying a load they were never designed to handle.
Final Adjustments and Balance Check
Every replacement ends with a full balance test to confirm that the door operates exactly the way it should.
What professionals verify before completing the job:
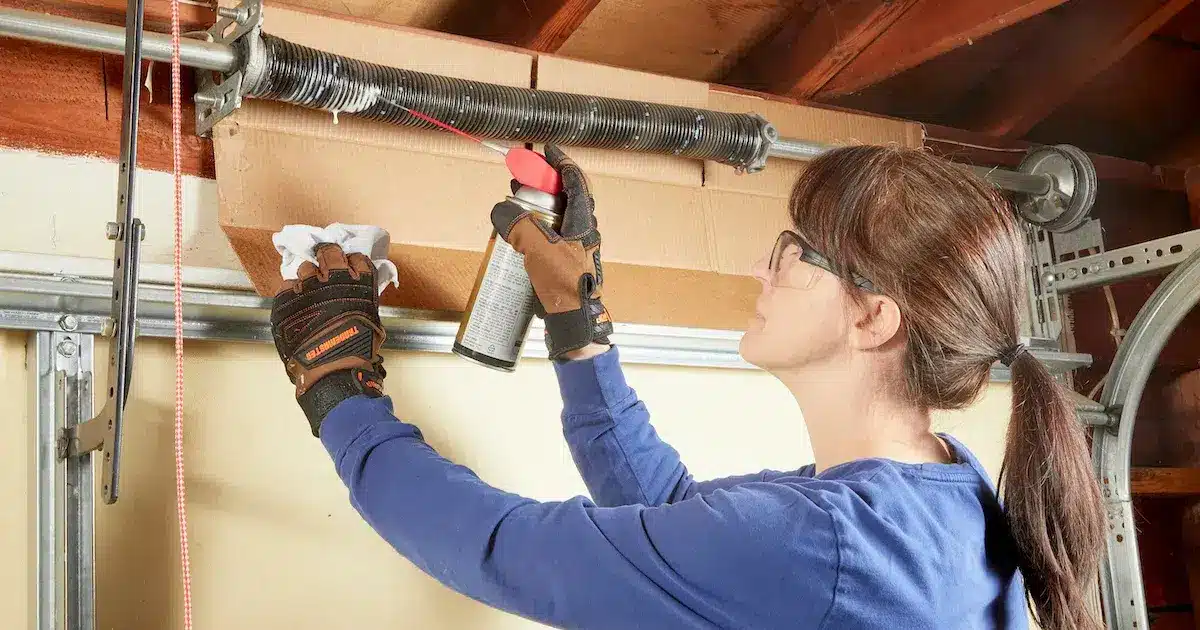
- Spring lube is applied to new springs and bearings to reduce friction and extend operational life
- Vice grips are removed, and the door is lifted manually to confirm it holds steady at three to four feet
- Opener is reconnected, and the trolley re-engaged to test the door under full automated operation
- Cables, drums, and tracks get a final inspection to confirm smooth operation across the system
A door that holds steady at waist height confirms that the tension is correct and that the garage door repair was completed correctly.
Factors That Affect Your Garage Door Spring Replacement Cost
Several variables influence what a homeowner in San Diego will pay when it comes time to replace garage door springs.
Key cost factors to keep in mind:
- Spring type affects labor time and tool requirements for the job
- Door size and weight determine the strength and cycle rating of the springs needed
- Replacing both springs instead of one affects the average cost, which may depend on parts and labor
- Additional cable or drum damage discovered during inspection adds to the overall cost
A thorough cost assessment upfront is what makes professional garage door spring installation a smarter investment than a rushed or incomplete repair.
How to Keep Your Garage Door Springs in Good Shape After Replacement
Getting springs replaced is only part of the equation because what happens after the repair determines how long the new springs last.
Maintenance habits that protect your investment:
- Lubricate springs, hinges, and rollers every three to six months to prevent rust
- Test the door balance monthly by lifting it manually to confirm it holds position
- Listen for unusual noises during operation as early indicators of developing spring issues
- Schedule a professional inspection once a year to catch wear before it leads to failure
To learn about the root causes that put the most stress on springs from the start, read our guide on What Causes Garage Door Springs to Break?, which covers every factor that leads to premature wear and unexpected failure.
Trust the Right Hands to Replace Your Garage Door Springs the Right Way
Replacing garage door springs involves more than just swapping out old parts, and every step of the process directly affects how well the entire system performs. Skipping steps or using the wrong parts turns a straightforward repair into a recurring problem that costs far more to address.
ADS Garage Doors & Gates proudly serves homeowners throughout San Diego, CA, with professional garage door spring replacement services built around precision and long-term performance. Contact us or give us a call, and let our team make sure every part of the replacement process is done correctly from start to finish.