How to Maintain Garage Door Opener Parts
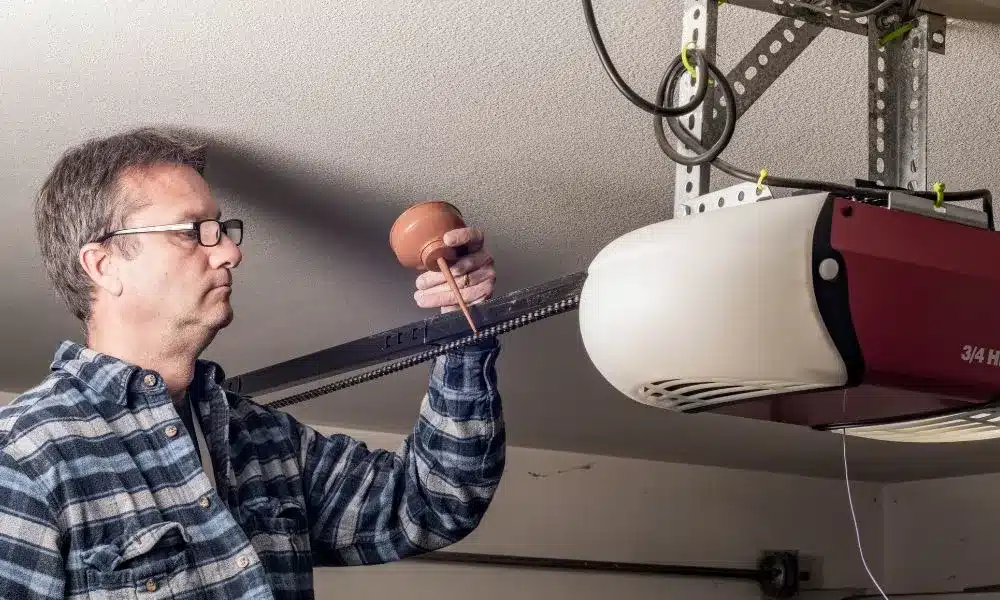
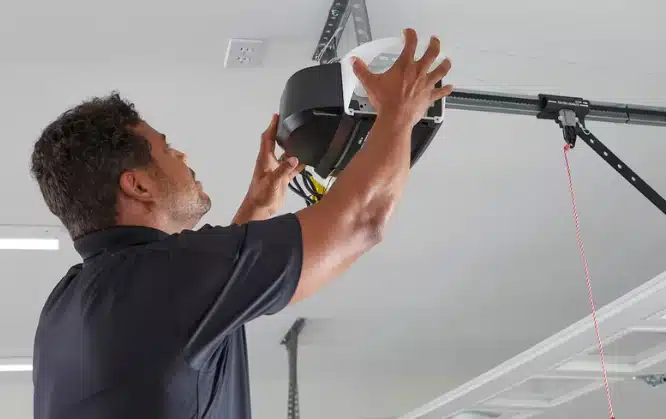
The parts inside a garage door opener work together as one system, and when even one component is neglected, the entire opener feels the impact. Knowing how to maintain garage door opener parts keeps the system balanced, quiet, and working properly every time the door moves. Understanding each part and knowing what to watch for helps homeowners avoid unnecessary garage door repair down the line. Every component has a specific role in the overall system, and giving each one the proper attention it needs is what keeps the entire opener performing at its best for years to come. Why Does Your Garage Door Opener Need Regular Maintenance? A garage door opener handles hundreds of open and close cycles every year, and without regular attention, the stress from each cycle builds up across the system until it starts to break down. Key reasons why regular maintenance matters include: Moving parts like rollers, hinges, and drive components wear down faster without proper lubrication. Safety sensors collect dust and debris that interfere with their ability to detect obstructions. Hardware such as bolts and brackets loosen gradually due to vibrations from daily operation. Springs and cables develop wear that is only visible during a close inspection. The motor unit works harder when other components are not functioning at their best. To understand how each part directly affects repair needs and system longevity, read our guide on How Garage Door Opener Parts Affect Repairs and Performance, which explains how individual components shape the overall condition of your opener. What Are the Parts of a Garage Door Opener You Should Always Check? Knowing what the parts of a garage door opener are gives you a clear picture of what needs attention and why each component matters to the overall system. Part Role Belt, Chain, or Screw Drive Moves the trolley along the rail to open and close the door Safety Sensors and Photo Eyes Detects obstructions and prevents the door from closing on people or objects Rollers, Tracks, and Hinges Guides the door along its path and keeps the movement smooth and aligned Springs and Cables Counterbalances the weight of the door to support every open and close cycle Motor Unit and Control Board Powers the entire system and processes all commands from remotes and keypads A problem with any one of these parts affects how the entire garage door opener performs and how often garage door opener repair becomes necessary. How to Maintain Your Garage Door Opener Parts the Right Way Lubricate Moving Parts Properly Proper lubrication reduces friction and extends the life of every moving part in your garage door opener. Proper lubrication includes: Silicone-based lubricant or white lithium grease works best on hinges, rollers, and springs Roller stems and hinge pivot points need direct application Chain drive systems require lubricant applied along the metal chain Belt drives only need lubrication on the metal rail, never on the rubber belt Wiping off excess lubricant prevents dirt from sticking to treated parts Correct product selection and consistent application keep every part moving freely throughout its full lifespan. Clean and Inspect Tracks and Sensors Dirty tracks and misaligned sensors are among the most overlooked causes of performance issues with garage door openers. Keep tracks and sensors in good condition by: Wiping the inside of the tracks with a dry cloth removes built-up dirt Vacuuming loose debris from the track surface prevents roller obstruction Cleaning the photo eye lenses with a soft cloth keeps the sensor beam accurate Solid LED indicator lights on both sensors confirm proper alignment Inspecting mounting bolts and brackets catches loosening hardware early Clean tracks and aligned sensors give your garage door opener a stable foundation for consistent performance. Test Safety and Security Features Regular testing confirms that every built-in safety and security feature on your garage door opener is working as designed. Key tests to perform regularly: A piece of wood placed in the door path tests the auto-reverse system Manual door lift to waist height checks whether the door holds its position Unplugging the motor unit confirms battery backup operation Keypad, remote, and smartphone app testing verifies all access points respond Rolling code technology should update automatically after each use Routine safety testing gives homeowners confidence that every protection feature is ready when it matters most. Optimize Remote Components and Controls Remote components and controls are the most frequently used parts of any garage door opener, and regular garage door maintenance keeps them reliable. Areas to review during routine maintenance: Remote and keypad batteries need replacement at least once a year Access codes should be updated periodically for stronger garage door security Emergency release handle position must remain accessible at all times Smartphone app settings should reflect current closing notification preferences Keypad cover and remote casing must be free of cracks and moisture entry points Well-maintained remote components keep every access point on your garage door opener working without interruption. How Often Should You Maintain Your Garage Door Opener Parts? Each part of your garage door opener wears at a different rate, and knowing the right maintenance frequency keeps the entire system running without interruption. Component Action Frequency Rollers and Hinges Lubricate with silicone or lithium grease Every 6 months Drive Chain or Belt Lubricate Every 6 to 12 months Sensors Clean and align Monthly Door Balance Test with manual operation Monthly Safety Reverse Test with the block method Monthly Remote Batteries Replace Yearly Mounting Hardware Tighten bolts and screws Yearly Following this schedule gives every garage door opener part the attention it needs before wear can affect overall system performance. What Happens When Garage Door Opener Maintenance Is Neglected? Skipping maintenance on your garage door opener puts every connected part under unnecessary stress that compounds with every cycle. Neglecting maintenance leads to: Dry rollers grind against the tracks and damage both surfaces over time Loose bolts and brackets cause the system to shift out of alignment Dirty sensors trigger false stops and reversals during normal operation Worn springs and
When to Repair or Replace Garage Door Opener Parts
Garage door opener parts wear down over time, and the line between a repair that makes sense and a replacement that saves more money is not always obvious. Making the wrong call can cost you more than you planned and leave your system in worse shape than before. Knowing when to repair or replace your garage door opener parts comes down to understanding what each warning sign actually means. A garage door repair can solve the problem completely in some cases, but in others, a full replacement is the smarter, more cost-effective option. Why It Matters to Know When to Repair or Replace Garage door opener parts do not fail without reason, and every ignored warning sign gradually puts more strain on the surrounding components until a minor issue becomes a much larger, more expensive problem. Key reasons why this decision matters include: Delayed repairs increase the load on the motor and drive system. A malfunctioning opener compromises your home’s security. Repeated short-term fixes often cost more than a well-timed replacement. Identifying the problem early gives you more options and better control. Acting at the right time protects the springs, cables, and connected components. To see how each part directly affects repair needs and system longevity, read our guide on How Garage Door Opener Parts Affect Repairs and Performance, which explains how components shape the overall condition of your opener. Common Garage Door Opener Problems and Warning Signs Recognizing the early warning signs of a failing garage door opener gives you the best chance of addressing the issue before more components are affected. Common warning signs to watch for include: Grinding or rattling noises indicate a worn gear, a loose chain, or a failing drive system. A door that stops, slows, or reverses signals a sensor or motor issue. A remote or keypad that stops responding may indicate a circuit board or signal problem. Visible rust, frayed cables, or cracked rollers are signs that parts are past their service life. An opener that works sometimes but not others points to an electrical or wiring fault. To learn what each of these issues means for your system, read our guide on What Are Common Garage Door Opener Problems?, which covers the most frequent failures homeowners encounter and what they mean for your opener. What Are the Parts of a Garage Door Opener Most Prone to Wear Understanding which garage door opener parts wear out the fastest helps you spot problems earlier and make better decisions about repair or replacement. Part Why It Wears Out Motor Unit Powers every cycle and weakens over time with heavy use Drive System Chain, belt, and screw mechanisms stretch and degrade with regular operation Safety Sensors Accumulate dirt and shift out of alignment, affecting door response Circuit Board Electrical components fail due to age, power surges, and moisture Springs and Cables Bear the full weight of the door and weaken under constant tension Trolley Assembly Slides repeatedly along the rail and wears down the carriage mechanism Remote and Keypad Exposed to daily handling and outdoor elements that cause signal and button failure Identifying which parts fail first makes every garage door opener repair discussion with a professional more productive. When Repairing a Garage Door Opener Makes Sense Sensor Misalignment and Minor Adjustments Sensor issues are among the most common garage door opener repair calls technicians handle, and most are resolved without replacing the entire unit. Watch for these sensor warning signs: Opener lights blink repeatedly when a close command is sent. One sensor light stays steady while the other flickers or stays off. Closing attempts fail consistently, while opening still works normally. Wiping the sensor lens with a dry cloth often restores normal operation. Repositioning the sensors so they face each other directly resolves most alignment faults. Sensor repairs are straightforward fixes that restore full opener function without touching the motor or drive system. Broken Gear or Chain Issues Drive system problems are a frequent reason homeowners call for garage door opener repair, and an isolated gear or chain issue rarely requires a full unit replacement. Signs the drive system needs attention include: Grinding sounds during operation point to a stripped or worn drive gear. Visible slack in the chain means tension has loosened beyond the normal range. Jerky door movement during a cycle signals wear in the drive system. Replacing the stripped gear restores smooth power transfer from the motor to the door. Tightening or replacing the chain resolves most drive-related noise complaints. Targeted drive system repairs extend the life of the opener without the expense of a full replacement. Remote and Keypad Fixes Many garage door opener problems that seem major turn out to be minor control issues that a technician can resolve in a single visit. Common remote and keypad issues to check include: Dead batteries are the most frequent cause of a non-responsive opener. Reprogramming the remote restores communication when signal pairing is lost. Worn keypad buttons stop registering input after prolonged exposure to the outdoors. Nearby electronics can block the remote signal from reaching the receiver. Replacing a faulty keypad costs far less than a new opener unit. Control issues are among the quickest and most affordable repairs available for any garage door opener system. Worn Rollers and Hinges Rollers and hinges take on significant daily stress, and replacing them is one of the most cost-effective repairs for any garage door opener system. Key indicators that rollers and hinges need attention include: Noisy or rough door movement points to rollers that no longer glide smoothly. Wobbling during operation indicates that the rollers have cracked or worn unevenly. Loose hinges cause door panels to shift, putting extra strain on the motor. Replacing worn nylon or steel rollers dramatically improves the quietness of the door’s operation. Addressing hinge wear protects the integrity of the full door panel structure. Roller and hinge replacement restores smooth operation and reduces the motor’s load during each cycle. When Replacing Your Garage Door Opener Parts Is Necessary
What Are Common Garage Door Opener Problems?
A garage door opener handles the full weight of the door cycle after cycle, and when something goes wrong, the entire system feels it. Garage door opener problems range from minor electrical hiccups to mechanical failures that stop the door from moving altogether. Identifying these problems early helps ensure timely garage door repair and fewer disruptions to your daily routine. This guide breaks down the most common garage door opener problems, their causes, and what every homeowner should do when they arise. Why Your Garage Door Opener Matters More Than You Think A garage door opener manages the full mechanical cycle of one of the heaviest moving parts in your home, and when it starts to fail, every connected component, from the springs to the sensors, feels the impact. Key reasons why your garage door opener plays a critical role in your home include: A functioning opener controls the speed and force of every door cycle It activates the safety sensors that prevent the door from closing on people or objects It manages the balance between the motor power and the weight of your garage door Modern garage door openers include security features that protect against unauthorized access A properly working opener extends the lifespan of the springs, tracks, and other connected components To understand how each part influences the condition of the full system, read our guide on How Garage Door Opener Parts Affect Repairs and Performance, which breaks down how components directly affect repair needs and performance. What Are the Parts of a Garage Door Opener? Knowing the parts of a garage door opener helps you understand where problems start and why certain repairs cost more than others. Part What It Does Motor Unit Powers the entire opening and closing cycle using either AC or DC motors Drive System Moves the door along the rail using a metal chain, rubber belt, or screw drive Trolley and Carriage Connects the opener arm to the door and physically pulls or pushes it Safety Sensors Detect obstructions near the bottom of the door and stop the cycle if something is in the way Remote Control and Wall Console Send signals to the opener to activate the door using rolling code technology Logic Board Controls every electronic function the opener performs, including alerts and timing Battery Backup In California, all newly installed residential garage door openers are required to have battery backup capability to keep the door operational during power outages Damaged garage door opener replacement parts in any of these areas can affect how the entire system performs. Top 10 Common Garage Door Opener Problems Garage door opener problems range from simple fixes to mechanical failures that stop the door from working entirely. # Problem What It Means 1 Weak or Dead Remote Batteries Dead batteries are the most overlooked cause of a non-responsive remote, and the first thing to check before assuming a bigger problem 2 Misaligned Safety Sensors Sensors that are dirty or out of alignment prevent the door from closing and trigger unexpected reversals 3 Locked Remote or Wall Button An accidentally activated lock button on the wall console disables all remotes, keypads, and smartphone controls 4 Door Reverses Immediately After Closing Incorrect travel limit settings or excessive spring resistance cause the opener to reverse before the door reaches the ground 5 Broken Gears or Sprockets A grinding noise with no door movement points to failed internal gears, which is common in older opener models 6 No Power to the Unit A completely unresponsive opener usually traces back to an unplugged unit, a tripped breaker, or a damaged logic board 7 Signal Interference Competing electronic devices disrupt the opener’s radio frequency and can cause the door to activate on its own 8 Broken Torsion Springs A snapped spring removes the counterbalance the motor depends on, making it impossible for the opener to lift the door 9 Strange Noises During Operation Rattling, grinding, or squeaking during a cycle points to loose hardware, worn parts, or components that need lubrication 10 Broken Trolley or Carriage A failed trolley or carriage breaks the mechanical link between the motor and the door, causing the motor to run with no movement Recognizing which problem you are dealing with is the first step toward getting the right garage door opener repair done correctly. What Causes These Garage Door Opener Problems? Understanding what drives garage door opener problems helps homeowners catch issues before they affect the full system. Common root causes behind most opener failures include: Worn-out gears, springs, and rollers lose their ability to function properly over time Skipped lubrication and alignment checks accelerate wear across the entire system Aging openers tend to have multiple parts failing at the same time Coastal humidity and salt air in San Diego speed up corrosion on mechanical components Incorrect setup or poor-quality parts put uneven stress on the system Knowing what drives these problems makes it easier to address the issue at the source rather than treating only the symptoms. How Do These Problems Affect Repair and Replacement Costs? The type and severity of a garage door opener problem directly determine the cost of repair or replacement. Here is how each common problem impacts repair and replacement costs: Broken springs and motor failures rank among the most expensive repairs due to parts and labor Sensor misalignment and remote issues are the most affordable to resolve Worn gears and trolley failures often require partial system replacement rather than a simple part swap Logic board damage from power issues or surges carries a higher repair cost than most expect Ignored problems pull more components into the repair scope over time Knowing how each problem affects the overall cost helps homeowners make informed decisions about repair and replacement. Troubleshooting and Solutions for Common Opener Issues Before calling a technician, there are a few basic checks that can help identify what is going on with your garage door opener. Common troubleshooting steps that address the most frequent opener issues include:
How Garage Door Opener Parts Affect Repairs and Performance
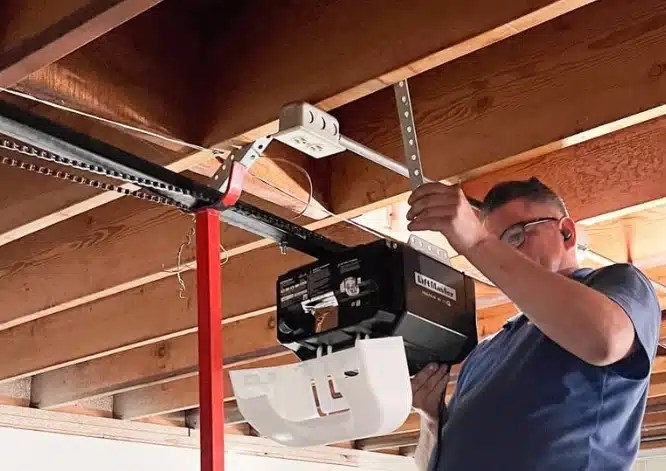
A garage door opener is a system where every part carries a specific load, and the moment one component weakens, the rest of the system works harder to compensate. That added strain is exactly what leads to a garage door repair that could have been avoided with earlier attention to the parts. The condition of each part inside the opener directly determines how smooth, consistent, and long-lasting the system’s performance will be. Homeowners who understand this connection are far better positioned to catch problems early and make smarter decisions about repairs and replacements. What Is a Garage Door Opener and How Does It Work? A garage door opener is a motorized device that automates the opening and closing of your garage door through a combination of mechanical and electronic components that work together as a single system. Key components that make this possible include: The motor unit generates the power needed to move the door up and down. The drive system transfers that power along the rail to pull or push the door. The trolley carriage physically connects the opener arm to the door panel. Safety sensors detect obstructions and stop the door from closing on people or objects. The logic board controls every electronic function the opener performs. To understand how these components break down in real situations, read our guide on What Are Common Garage Door Opener Problems?, which covers the most frequent issues homeowners in San Diego encounter with their opener systems. What Are the Parts of a Garage Door Opener and How Do They Affect Performance? Every garage door opener is built from several interconnected parts that each carry a direct role in how well the system runs and how long it lasts. Part What It Does How It Affects Performance Motor Unit Powers the entire opener Low horsepower causes overheating and slow movement Drive System Moves the door along the rail Belt drives are quieter, chain drives are louder but more durable Trolley Carriage Connects the opener arm to the door Worn trolley causes jerky or incomplete movement Safety Sensors Detects objects in the door’s path Misalignment causes the door to reverse unexpectedly Logic Board Controls all electronic functions Faulty board causes a complete malfunction Gears Transfers power from the motor to the drive Stripped gears make the motor run, but the door won’t move Battery Backup Powers the opener during outages Without it, the door won’t operate when the power goes out When any of these parts wear out, it directly increases the need for garage door opener repair and affects the system’s overall performance. Common Garage Door Opener Problems San Diego Homeowners Face San Diego homeowners face a specific set of garage door opener problems that stem from everyday use, coastal humidity, and deferred maintenance. Common problems that show up most often include: Loose or worn drive chains slap against the rail, creating loud banging sounds. Misaligned safety sensors cause the door to reverse right after it starts closing. Stripped gears keep the motor running while the door stays completely still. Faulty logic boards trigger erratic behavior, like the door moving without input. A battery backup that has reached the end of its lifespan causes the door to stop working completely during a power outage, which is a code compliance issue in California. Early identification determines whether a single garage door opener replacement part solves the problem or the full system needs an overhaul. How Garage Door Opener Parts Influence Repairs The condition of individual garage door opener parts directly determines how many components a technician needs to address during a single service call. Part How It Influences Repairs Motor Unit An underpowered or overworked motor burns out faster and triggers a full unit replacement Drive System Lack of lubrication on the chain or belt increases friction and forces the motor to work harder Trolley Carriage Worn carriages create resistance that gradually damages the opener arm and drive system Safety Sensors Misaligned sensors trigger repeated reversal cycles that put unnecessary strain on the motor Logic Board A damaged board affects every connected component and often requires a full system diagnostic Gears Stripped gears are one of the most common causes of failure under excess load Battery Backup A failed battery backup forces manual operation, which puts added stress on the disconnect mechanism Overlooking even one part can lead to a growing list of garage door opener repair parts needing replacement all at once. When to Repair or Replace Your Garage Door Opener Parts Knowing whether to repair a single part or replace the entire unit helps San Diego homeowners avoid overspending on the wrong solution. Situation What to Do Why Opener is under 7 years old Repair Most components still have usable life left Single part has failed Repair Replacing one part restores full function at a lower cost Motor runs, but the door won’t move Repair Usually a stripped gear or worn trolley is easy to replace Opener is 10 to 15 years old Replace Age increases the likelihood of multiple parts failing soon after Multiple parts failing at once Replace Repairing several components at once often costs more than a new unit Replacement parts no longer available Replace Discontinued models make garage door opener replacement parts hard to source Repair cost approaches the price of a new unit Replace Investing in a new opener makes more financial sense long-term No smart features or rolling code technology Replace Modern openers offer better security and smartphone connectivity Opener lacks battery backup capability Replace California law requires all newly installed garage door openers to include battery backup as standard To make this decision with full confidence, read our guide on When to Repair or Replace Garage Door Opener Parts, which walks through every scenario a homeowner needs to weigh before committing to either option. How to Maintain Your Garage Door Opener for Long-Term Performance Consistent garage door maintenance is the most practical way to protect every part of your opener and extend the
How to Replace Garage Door Springs the Right Way
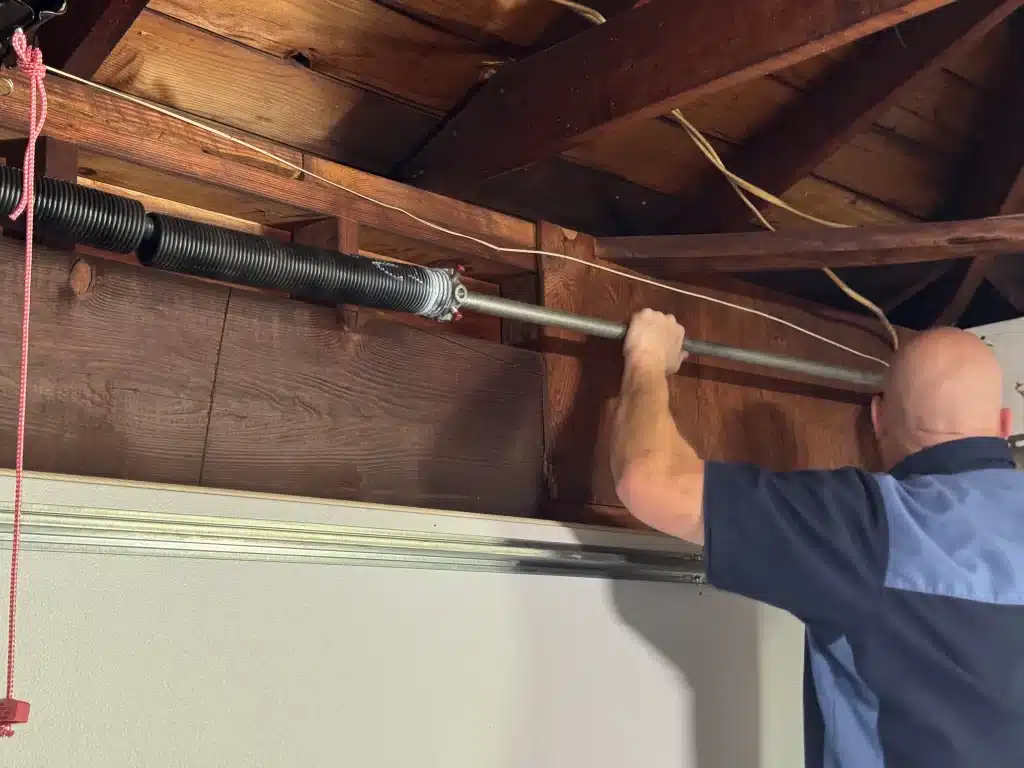
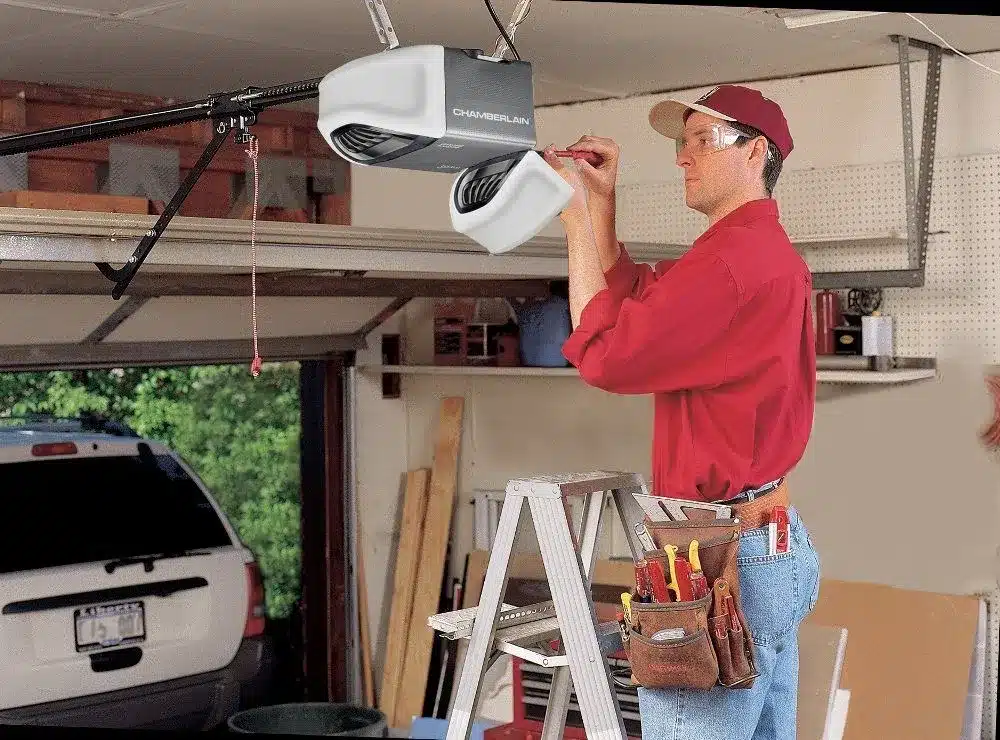
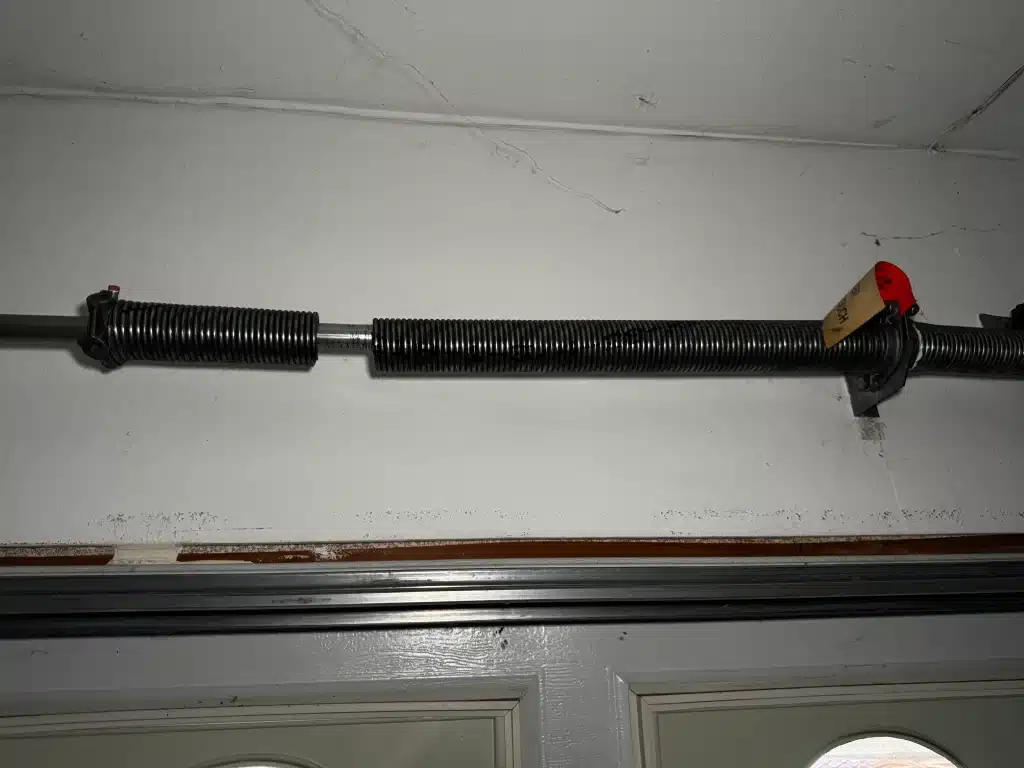
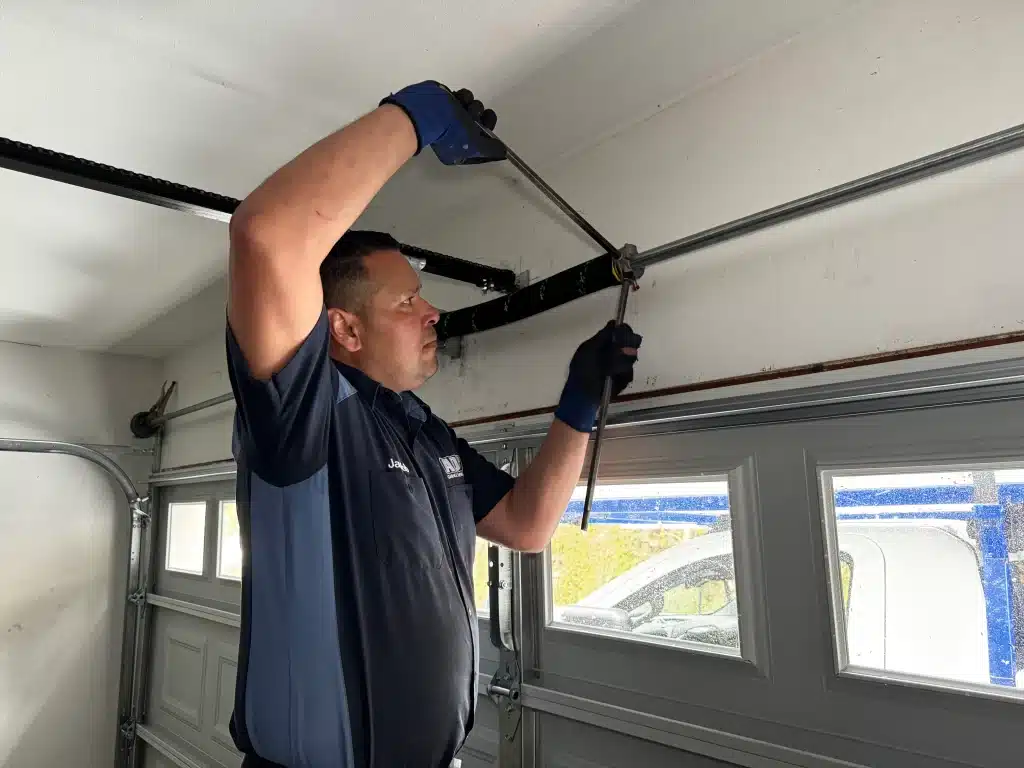
Replacing garage door springs the right way requires more than just removing the old ones and sliding in new ones. Every step of the process follows a precise order that professional technicians in San Diego are trained to execute correctly, and skipping any part of that order puts the entire door system at risk. Getting garage door spring repair done the first time correctly protects the entire door system from unnecessary wear, uneven movement, and costly damage. This guide covers everything from identifying the right spring type to understanding the full replacement process. Why Should You Hire a Professional to Replace Garage Door Springs? Garage door springs store an enormous amount of energy, and releasing that energy without the proper training or specialized tools creates a safety hazard that puts the entire door system and everyone nearby at risk. Key reasons why professional handling is the only way to go: Professional technicians carry specialized tools designed specifically for winding and unwinding torsion springs under extreme tension Improper installation of the wrong spring creates additional strain on the cables, drums, and garage door opener A broken torsion spring that is mishandled during removal can release stored energy violently and cause severe injuries Professional technicians inspect the full system during replacement to catch any related issues before they turn into costly repairs To understand what drives the price of a professional spring replacement, read our guide on Why Is It So Expensive to Replace Garage Door Springs?, which breaks down every contributing factor in detail. What Homeowners in San Diego Should Know About Garage Door Springs The Two Main Types of Springs Used in Most Garage Doors Knowing which spring type is installed on your garage door is the first thing any technician confirms before starting a replacement job. Factor Torsion Springs Extension Springs Placement Mounted horizontally above the door opening Runs along both sides of the door How It Works Twists to generate tension and lift the door Stretches and pulls the door upward Best For Modern residential garage doors Older and lighter garage doors Lifespan Longer cycle life under regular use Shorter cycle life, wears faster Safety Requirement None required Must be paired with safety cables Identifying the correct spring type from the start ensures the right parts are ordered, and the replacement is completed without delays. Why the Type of Spring Affects the Replacement Process Every decision made during a spring replacement job is shaped by the type of spring installed on the door. Here is why spring type matters in every replacement job: Torsion springs require specialized winding bars and precise turn counts Extension systems involve pulleys and safety cables that must all be replaced together Load capacity differences determine the exact wire gauge and size of the replacement spring Wrong spring selection forces a full redo, adding unnecessary time and cost to the job Knowing the spring type upfront allows every garage door spring replacement to be completed with the right parts and no guesswork. Warning Signs That Tell You a Spring Replacement Is Overdue Spring problems rarely appear out of nowhere, and recognizing the early signs gives you enough time to act before the entire system gives out. Watch for these warning signs: A visible gap in the torsion spring coil means the spring has completely snapped Unusual noises like grinding or popping signal that the springs are losing tension Uneven movement where one side rises higher points to an unbalanced load The door feels extremely heavy when lifted manually, confirming the springs are failing Frayed or slack cables on either side indicate the springs have lost necessary tension To spot these warning signs before they turn into a full breakdown, read our guide on Signs Your Garage Door Springs Are About to Fail, which covers the most telling indicators homeowners notice before complete failure occurs. How Garage Door Spring Replacement Is Done the Right Way Safety Preparations Professionals secure the entire work area before touching any component to eliminate the risk of accidental door movement. Key preparations done before any work begins: The garage door opener gets disconnected, or the breaker is turned off to prevent accidental activation C-clamps or locking pliers are placed on both tracks above a roller to lock the door in the closed position Safety glasses and gloves are worn throughout the entire process to protect against metal fragments The work area is cleared of anyone not directly involved to eliminate the risk of injury from a sudden spring release Every skipped preparation can turn a routine replacement into a property damage or injury situation. Unwinding and Removing the Old Springs Removing old springs is the most tension-intensive part of the job, and professionals follow a strict sequence to release that energy safely. Steps followed during removal: Right-hand wound and left-hand wound springs are identified first to ensure correct replacements are ordered Hardened steel winding bars release tension from the winding cone one-quarter turn at a time Both springs are removed even when only one is broken because the other has endured the same wear Set screws on cable drums are loosened, and lift cables are disconnected before the springs slide off the bar Releasing stored tension in a controlled sequence is what prevents sudden failure or injury during removal. Installing the New Springs Getting new springs onto the torsion bar correctly determines whether the door will operate with proper balance after installation. What happens during a new spring installation: The torsion bar gets cleaned and lightly lubricated before the new springs slide into position New springs are matched to the correct wire size and inside diameter based on door weight Stationary cones are bolted securely to the center anchor bracket to keep everything aligned Lift cables are reinserted into drums and rotated to remove slack before set screws are tightened Secure mounting on the center bracket provides new springs with a solid foundation to withstand thousands of cycles without failure. Reinstalling Cables and Setting Tension Setting the correct tension
Signs Your Garage Door Springs Are About to Fail
Garage door springs carry the full weight of the door every time it moves, and after years of that constant pressure, they begin to show signs of wear long before they completely break. Those signs are easy to overlook, and ignoring them often leads to a sudden failure that leaves your garage door completely out of service. Paying attention to the warning signs that your garage door springs are about to fail can save you from a sudden breakdown and expensive damage to your entire garage door system. This guide covers every major sign in detail, so you know exactly what to watch for and when to call for garage door spring repair. Why Do Garage Door Springs Break in the First Place? Every garage door spring is built to handle a specific number of cycles, and with each open and close, that count decreases until the spring no longer carries the necessary tension to support the door’s weight. Several factors push garage door springs toward failure earlier than expected: Daily use gradually reduces the cycle life until the spring can no longer hold tension Missing lubrication creates friction that breaks down the metal coils over time Coastal San Diego salt air causes rust and corrosion, which makes the spring brittle Fluctuating temperatures cause the metal to expand and contract until it weakens A spring installed at the wrong wire size wears out well ahead of schedule To understand how these wear factors manifest as real problems in your system, read our guide on What Causes Garage Door Springs to Break?, which covers every major cause homeowners need to know before a complete failure occurs. Warning Signs Your Garage Door Springs Are About to Fail A Loud Banging or Snapping Sound A sudden loud bang from the garage is one of the most recognizable indicators that a torsion spring has snapped under extreme tension. Watch for these indicators: A loud bang echoes from the ceiling area, even when no one is using the door The opener runs its full cycle, but the door does not move at all The spring visibly shows a separation or gap after the sound occurs Smooth operation stops completely, and the door feels impossible to move A snapped spring releases stored energy instantly, and the door loses all counterbalance the moment the coil gives out. Visible Gaps in the Spring Coils Knowing what a broken garage spring looks like starts with spotting a visible separation in the coil that signals the spring has fully given out. Look closely for these signs: A one to two-inch gap appears somewhere along the length of the coil The spring looks stretched or uneven compared to the one on the other side Coil spacing is no longer uniform, and the winding appears irregular Metal near the gap appears jagged or sharp from where the break occurred Broken coils are among the most direct indicators of spring failure, and the door’s weight is no longer supported the moment that gap appears. Door Feels Extremely Heavy to Lift Springs are designed to offset the full weight of the door, and a door that suddenly feels impossible to lift manually points directly to a spring that has lost its tension. Pay attention to these clues: Pulling the manual release cord reveals a door that barely budges off the ground Lifting the door manually requires significantly more effort than it ever has before The opener strains audibly or stops midway before completing the full cycle The door weight feels unbalanced and heavier on one side when lifted by hand Loss of spring tension forces the opener and cables to carry an unintended load, and regular garage door maintenance catches this before it worsens. Crooked, Shaky, or Uneven Door Movement Uneven movement during operation indicates that one spring in a pair has failed, while the other continues to carry more than its share of the load. Notice these movement patterns: One side of the door rises noticeably higher than the other during opening Visible shaking or wobbling occurs throughout the full range of motion The door tilts toward one side of the garage door as it travels upward Movement feels jerky and inconsistent instead of fluid and controlled Uneven movement puts additional strain on the tracks, cables, and opener, and long-term damage to the springs can eventually lead to a full garage door replacement. Door Won’t Stay Open or Only Opens Partially Functioning springs maintain the necessary tension to hold the door in a stable open position, and a door that drifts back down has lost that balance entirely. Watch for these behaviors: The door slowly drifts back down after being lifted to the fully open position Opening stops after just a few inches despite the opener completing its full cycle The opener reverses direction on its own without any obstruction in the path Holding the door open manually reveals an immediate and consistent downward pull Every failed attempt to hold the door open adds strain to the opener motor and cables until something else gives out. Loose or Corroded Cables and Springs Rust, fraying, and visible wear on the cables and springs are early signs of deterioration that appear well before a complete failure. Look for these physical changes: Orange or brown discoloration runs along the full length of the spring coil Cables appear frayed, slack, or hanging loosely along the side of the door Wire size along the coil looks inconsistent, where corrosion has thinned the metal End cones show visible buildup or cracking where the cable connects to the spring Corrosion accelerates spring failure in coastal climates, and early detection is the best reason to call for professional garage door repair before the damage spreads. What to Do Next When You Notice These Warning Signs Spotting the warning signs early means nothing without taking immediate action to prevent further damage to your entire garage door system. Here is what you need to do right away: Disconnect the automatic opener and
What Causes Garage Door Springs to Break?

Garage door springs go through thousands of cycles of tension and release, and that constant stress is exactly what makes them vulnerable to breaking. Several specific factors speed up that process and cause springs to fail well before their expected lifespan. Identifying the causes of garage door spring breakage is key to catching problems early and avoiding a full system shutdown. This guide walks through every major cause, so homeowners know what to watch for and when to call for garage door spring repair. What Does a Broken Garage Spring Look Like? A broken garage door spring leaves behind physical signs that point directly to what went wrong inside the coil, and recognizing those signs early can save homeowners from a much more expensive repair down the line. A broken garage door spring looks like: Coils with a visible gap or split in the middle where the metal has fully separated The loose spring hangs above the door instead of sitting tight and winding on the bar Dark staining, rust, or flaking metal scattered across the coil surface One spring that looks uneven or lopsided compared to the one on the opposite side Cables lying slack on the ground instead of running taut up to the drum One side of the door is noticeably lower because the spring can no longer support it To understand what drives garage door springs to failure, read our guide on Why Is It So Expensive to Replace Garage Door Springs?, which walks through every factor behind spring failure and the need for professional replacement. Common Causes of Garage Door Spring Failure Normal Wear and Tear Over Time Every garage door spring is rated for a set number of cycles, and daily use counts down that number until the spring can no longer carry the door. Watch for these indicators: Cycle count has reached or exceeded the spring’s rated lifespan Door operation feels slower or more labored than before Springs produce low creaking sounds during movement, even after lubrication The door struggles to stay open at the halfway point without drifting One spring shows more visible fatigue than the other in a pair Replacing springs at or near their cycle limit prevents the kind of sudden failure that leaves the door stuck and the entire system out of commission. Rust and Corrosion Buildup Rust goes beyond affecting how a spring looks because it actively breaks down the metal structure and increases friction on every cycle until the coil gives out. Rust and corrosion show up as: Reddish-brown discoloration spreading across the coil surface Flaking or powdery metal falling from the spring during door movement Coils that grind instead of flexing smoothly during operation Visible pitting or rough texture forming along the wire Lubrication no longer absorbs evenly because the surface is too damaged Catching corrosion early and keeping springs lubricated slows the breakdown before it reaches the point of no return. Poor Maintenance and Lack of Lubrication Friction is the enemy of garage door springs, and skipping lubrication lets that friction build up until the metal starts breaking down from the inside. Neglected springs show these patterns: Squeaking or grinding sounds that grow louder over time Coils that look dry, dull, or powdery instead of having a slight sheen Visible wear lines forming along the wire surface Door movement becomes jerky or uneven during normal operation Springs heat up faster than usual due to excess friction Regular application of lubricant every 4 to 6 months is the easiest way to extend spring life and prevent unnecessary wear throughout the system. Wrong Spring Size or Type Installed Installing a spring that does not match the door’s weight forces the metal to work outside its design limits on every single cycle. Mismatched springs cause these problems: The door feels unusually heavy when lifted manually, even with springs in place One side of the door rises faster than the other during operation Springs wear out far ahead of their rated cycle count Garage door opener strains audibly to complete each open and close cycle Cables come off the drums repeatedly due to uneven tension distribution Wrong sizing causes a chain reaction of damage, and proper garage door spring installation ensures the right spring is matched to the door from the start. Extreme Weather and Temperature Changes in San Diego, CA Steel expands in heat and contracts in cold, and repeated exposure to temperature shifts adds stress to the metal that compounds quietly over time. Temperature-related stress appears as: Stiffer spring movement during cooler mornings in inland San Diego areas Lubricant breaks down faster in high heat and leaves coils unprotected Salt air, combined with temperature swings, speeds up surface corrosion Springs snapping during cold snaps after seeming fine the day before Higher spring stress in uninsulated garages from greater temperature swings Keeping springs lubricated and inspected regularly helps prevent the wear caused by San Diego’s coastal and inland climate conditions over time. High Cycle Limit Has Been Reached Every spring has a maximum number of cycles built into its design, and once that limit is reached, the metal has nothing left to give. Signs a spring has hit its cycle limit include: Spring was installed seven or more years ago without replacement The door feels noticeably harder to lift manually than it did before Coils look fatigued, flattened, or unevenly spaced on visual inspection The opener motor runs longer than usual to complete a full cycle Minor repairs to the spring system have become more frequent Pushing a spring past its rated limit turns a predictable replacement into an unpredictable failure that can take the whole system down with it. Damaged Components Putting Extra Strain on Springs Garage door springs do not carry the load alone, and when other parts of the system fail, the springs absorb the extra stress until they give out. Damaged components create these conditions: Worn rollers drag against the tracks and force springs to work harder Bent tracks cause the door to
Why Is It So Expensive to Replace Garage Door Springs?
Garage door springs are under constant tension every time the door moves, and when they break, the replacement cost is higher than most people expect for good reason. The danger involved, the expertise required, and the quality of parts all play a direct role in what you pay. Garage door spring repair is not a job that can be rushed or handled without proper training and specialized tools. This guide breaks down every cost factor so you understand exactly what goes into a professional spring replacement and why the price is fully justified. What Causes Garage Door Springs to Break? Garage door springs endure significant stress over their lifetimes, and understanding the root causes of failure helps you recognize warning signs before the problem completely affects your access to the garage. Several factors push springs toward failure earlier than expected: Daily use wears down the coils until the spring can no longer hold tension Missing lubrication creates friction that breaks down the metal over time Rust and corrosion from coastal air make the wire brittle and weak Temperature swings cause the metal to expand and contract until it weakens A wrong-sized spring works harder than designed and fails ahead of schedule Loose set screws or misaligned end cones create uneven tension and sudden failure To understand how these failure factors show up as real problems in your system, read our guide on What Causes Garage Door Springs to Break?, which covers the most common mechanical stress points that lead to a complete spring failure. The Real Reasons Behind Garage Door Springs Replacement Cost High Danger and Technical Skill Required Torsion springs operate under extreme tension, and handling them without proper training puts everyone nearby at risk of severe injuries or property damage. Key reasons this job demands professional expertise: Torsion springs store enough energy to cause injury if released without control Winding and unwinding require specialized tools that most homeowners do not own One miscalculation can send metal components flying at dangerous speeds Technicians follow strict safety protocols built through years of field experience Liability insurance protects the homeowner if something goes wrong on the job Proper spring handling requires technical knowledge that only comes from completing hundreds of real garage door spring replacement jobs under supervised conditions. Labor Costs and Technician Expertise Skilled technicians charge for years of training and the ability to diagnose problems that go well beyond the broken spring itself. What drives labor costs on every spring replacement job: Diagnosing the full door system takes time before any repair begins Removing existing springs safely requires a controlled process that cannot be rushed Installing new springs at the correct tension demands precision and technical knowledge Testing door balance after installation adds necessary time to every service call Local labor rates reflect the cost of running a licensed and insured operation Every dollar spent on skilled labor covers the experience needed to get the job done the first time correctly, without creating new problems in the process. Component Quality and Spring Type Spring type and build quality account for a large portion of the total cost of garage door spring replacement. What separates spring options and affects what you pay: Torsion springs cost more than extension springs due to their complexity High-cycle springs carry a higher price but reduce the need for replacement Wire size and coil diameter must match the door weight to avoid premature wear Cheap springs wear out faster and cost more through repeated replacements Professional-grade parts come with warranties that budget alternatives rarely offer Choosing the right spring type from the start saves homeowners from paying for repeated replacements caused by mismatched or low-quality components. Additional Repairs From Related Damage A broken spring rarely fails on its own, and connected components absorb the impact in ways that often require repair during the same service call. Common components that get damaged when a spring fails: Cables fray or snap when forced to carry the full door weight alone Rollers crack or flatten under the uneven load of a failed spring Drums warp or shift when the tension balance across the door is lost The opener motor overworks trying to lift a door without spring support Brackets and hardware loosen under the additional strain after spring failure A prompt garage door repair appointment keeps spring damage from spreading to cables, rollers, and other connected components. Required Safety Inspection After Replacement Every professional spring replacement includes a full system inspection, and that added time protects the homeowner from failures that develop quietly between service visits. What gets covered during a post-replacement inspection: Cable condition is checked for fraying or wear that could lead to sudden failure Roller and track alignment is verified to confirm smooth door movement The balance test confirms spring tension is correctly set for the door weight Hardware, including brackets, bolts, and drums, is checked for looseness The opener is tested to confirm it responds correctly to the balanced door A thorough inspection after every spring job gives homeowners peace of mind that the entire system is working correctly before the technician leaves the property. How to Know When Your Springs Need Replacing Garage door springs give clear warning signs before they fail completely, and knowing what to look for keeps the damage from spreading to the rest of the system. Watch for these warning signs: A visible gap in the torsion spring coil is a direct sign that the spring has snapped The door refuses to open because the spring can no longer carry the door’s weight Grinding or popping sounds during operation mean the spring is under abnormal stress One side of the door sits lower than the other due to uneven spring tension The opener strains or slows down when a weakening spring overloads the motor A door that drops faster than normal has lost the tension needed to control its descent To spot these problems before they trigger a complete failure, read our guide on Signs Your Garage Door
Why A Maintenance Plan For Your Garage Door Is A Smart Idea
Your garage door generally undergoes more wear and tear than anything else in your home. Although some people only open and close their garage door twice a day, many garage doors end up performing four or five open-and-close cycles on many days. This constant use puts lots of strain on the door, opener and all the other components, which is why regular garage door maintenance is essential. While you can just call to have your garage door serviced every year, we’ll show you the additional benefits you’ll get from signing up for a professional maintenance plan. Increased Lifespan for Your Garage Door and Opener Depending on what type of garage door you have and what it is made from, you can typically expect it will last for somewhere between 15 and 30 years. On the other hand, you’ll often need to have your garage door opener replaced every 10 years or so. However, there is a significantly higher chance that either the garage door, opener or both will need to be replaced much sooner if you don’t take steps to ensure that everything is properly maintained and in working order. Issues like a bent track, loose hardware, worn-out rollers, and damaged springs can lead to a garage door not opening and closing smoothly. If the door doesn’t move smoothly, it will put lots of extra strain on the opener and potentially lead to its motor either wearing out sooner or suddenly seizing up. If any of the hardware is loose, there is also a high chance that the panels can suddenly bend, break or collapse and force you to replace the door. When you choose a maintenance plan for your garage door, it means someone will regularly check and take care of it for you. This is a smart move because keeping your garage door and all its parts in good shape can save you money in the long run. Things tend to last longer when they’re well-maintained. Plus, it can stop expensive problems before they start, and you won’t have to worry about your garage door unexpectedly breaking down. Ensuring Your Garage Door Operates Safely Maintenance is especially important for ensuring that your garage door continues to operate safely, as they can be far more dangerous than most people think. On average, garage door accidents cause between 20,000 and 30,000 injuries in the US alone each year, with some of them unfortunately being fatal. These numbers also don’t take into account the thousands more who suffer more minor injuries and don’t seek medical treatment. Part of the reason that garage doors can be so dangerous is simply because they weigh so much. Most residential doors weigh at least 200 to 300 pounds, and larger commercial doors can often weigh over 1,000 pounds. The movement typically causes a door to become imbalanced over time. If the door isn’t maintained and rebalanced regularly, it can potentially come crashing down suddenly and seriously injure or kill anyone underneath it. Another crucial step in maintaining a garage door is to check that its safety mechanisms are working correctly. Most doors have two separate mechanisms that ensure they can’t close if there is a person or object in the way. The safety sensors on either side of the door work by sending light back and forth and will automatically cause the door to stop closing and reopen if anything is in the way and blocks the light. Most doors also have an automatic reverse feature that will detect if the door touches any objects and cause it to immediately stop closing. The torsion or extension springs on a garage door are also under extreme tension. If the springs are damaged or have started to wear out, they can break and go flying. This can easily lead to severe injuries or cause major damage to your vehicle and anything else that is stored in your garage. Keeping Your Home Secure Regular garage door maintenance is also important for ensuring that your garage and the rest of your home are secure. Modern garage doors and openers are much more secure than they were in the past. However, they can still have a variety of issues that can make it much easier for anyone to open the door and break into your garage to steal any valuables or your vehicle. Once inside the garage, the thieves can then potentially gain access to your house. Naturally, whether they can get in depends on the security of the door between your garage and your home. If someone breaks into your garage, homeowner’s insurance will typically cover the costs to repair any damage or replace the door. Most policies will also pay to replace any stolen items up to a certain dollar amount. However, if the insurance adjustor determines that your garage door wasn’t secure due to a lack of maintenance, there is a chance that your claim may be denied. Improving the Energy Efficiency of Your Home Another essential garage door maintenance task is inspecting the rubber weather strip on the bottom of the door and replacing it when necessary. The purpose of the weather strip is to create a tight seal between the door and the concrete below it. In this way, it helps to prevent water from seeping underneath the door into the garage and potentially causing damage. It also helps to keep the outside air out so that your garage remains at a more consistent temperature. If the weather strip is cracked, has deteriorated or pieces of it are missing, it will negatively impact the energy efficiency of your home and lead to your energy bills increasing. This is because a garage that is much hotter or colder will lead to a residential HVAC system needing to run much more and using much more energy. This is another advantage of having your garage door maintained and inspected regularly since it can reduce your energy costs and potentially save you quite a bit of money in
Surviving Insecure Times with Roll-up Security Doors
We don’t need to explain the difficult challenges that retailers, restaurateurs, and other commercial property owners have struggled with over the past year. The future is both hopeful and still uncertain, and we are all looking for ways to sustain our businesses while preparing for the return of greater numbers of live customers. Before the pandemic, upwards of 90% of retail business passed through the doors of brick-and-mortar stores; post-COVID-19, it is hard to predict other than a full “return to normal” is unlikely for many businesses. What the “new normal” will look like is just beginning to take shape, but we can be sure the strategies for business success will need to adapt. One direction this adaptation is already moving is through addressing the security needs of the points of entry to your building, both front and back—and sometimes interior. And one of the best ways to do this is with roll-up security doors. Business losses from theft and vandalism have risen, and the lack of effective security during these unusual times is one of the reasons. Commercial roll-up security doors are often the best solution to keep your property (both inventory and buildings) safe by reducing the risks of destructive and costly intrusions. These measures will likely lower or perhaps, in some cases, even eliminate the expenses of other security measures such as video surveillance and guards. There are a variety of materials and styles that are available, and security doors need not make your establishment look like an uninviting fortress. They can provide restaurants and traditional storefronts an extra layer of protection while remaining virtually out of sight during business hours. They can provide pad-lockable bars for the hours when your property needs to be most secure. [company_name] has decades of experience helping scores of San Diego-area businesses with the best solutions for the look, unique needs, and cost-effectiveness of their roll-up security doors and windows. There is no one solution, but a full range of attractive options. Whether you need a commercial door with enhanced safety, visibility, and ventilation, or a space-saving design for high-traffic areas, no matter the size of the application, manufacturers have a variety of options to choose from. If ventilation for temperature or air quality is a concern, consider roll-up doors with built-in openings, “breathing” perforations, or curtain-style grille designs. For added light or visibility into other rooms, similar options are available. [company_name] knows them all and will help you discover the best decisions. Considered as part of an integrated system with glass overhead doors, we can walk you through creative solutions that will enhance your customers’ experience and provide efficiency for your staff’s efforts. There is another component to this discussion that we want to address: Emergency egress. What happens when a situation develops which requires quick evacuation, or access by first responders? What can you do to keep the security door from becoming a trap or a barrier to quick medical care? In most cases, an emergency grille is the best answer, providing an automatic opening when power is shut off or an alarm is triggered to allow immediate escape. When the power is restored or the alarm system is reset, the automatic roll-up door will automatically reboot for operation. Fire egress doors will shut automatically when signaled by a fire alarm to prevent flames and smoke from spreading. We realize there are complex business questions that will enter into your decision on security doors or grilles. [company_name] is prepared to give you straight answers to these questions and guide you through the pros and cons to help you find the best answers for your future success. We encourage you to call [phone] to start the conversation.